printing technique
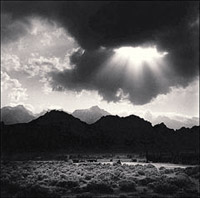
| God Rays, Eastern Sierra, CA 1995
I made this negative when I was 23. I had just bought an old Hassleblad outfit and wanted to go and use it, not spend a week or two testing the camera, film and meter. The exposure and development was a bit off, but the final outcome turned out as I envisioned. This was the first print I made where I felt that I had truly succeeded in shaping the negative to my emotional feeling of the scene. |
 |
|||||
 |
||||||
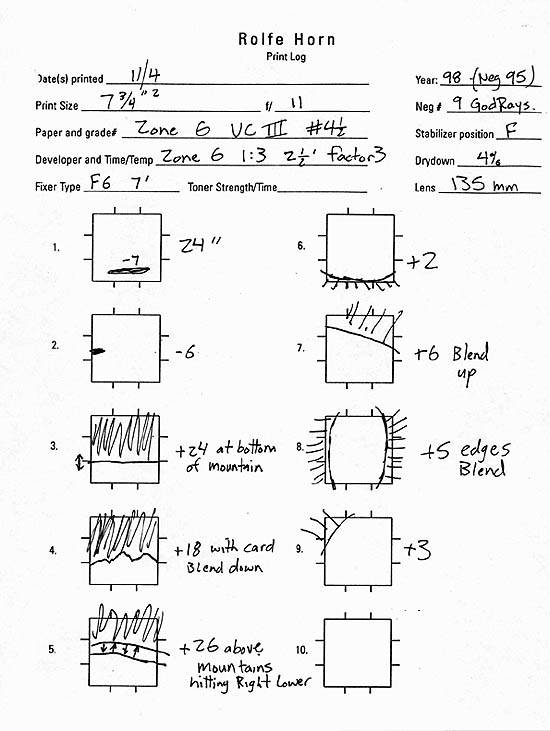
| This is how I record the steps to create the final photograph. The boxes are to note any manipulations, dodging, burning, or contrast changes. This sheet covers all the basics: date, cold light stabilizer position, type of paper, contrast grade, f-stop, paper drydown %, developer type and factor for development, focal length of the lens used, fixer type, the toner(s) used (dilution/duration) and, of course, the negative ID. If you can read my scribbled writing, you may get an idea of what it took to get the final image. If you don't understand any of it, don't worry, you can see the difference in the two images above. |
 |
|||||